-40%
COMPLETELY REVERSIBLE Polaroid 110- 110B, and 120 to Graflock 4x5 conversion kit
$ 68.11
- Description
- Size Guide
Description
3-D printed45
gl r
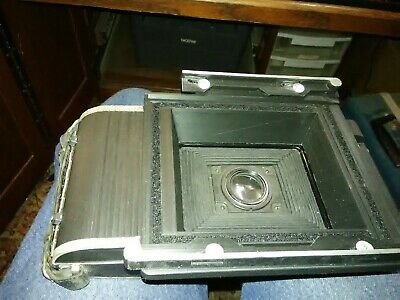
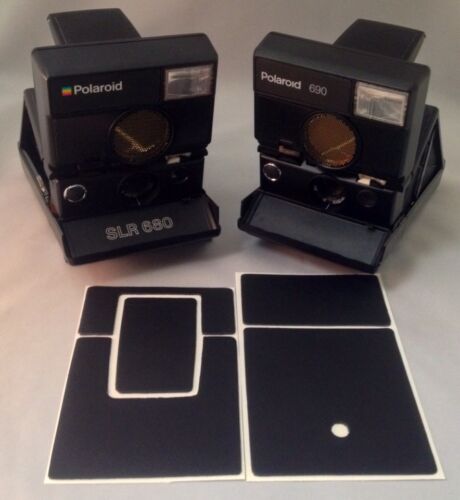
oll film Polaroid conversion kit( does not include the camera, film backs, or ground glass-kit shown has elements highlighted with silver marker for clarity, tell me in the comments whether you want me to do that to your kit for you).
Cameras from Polaroid’s early days are wonderful looking, have some great lenses, and have held up remarkably well due to very good build quality. Some of the most popular were the 110, 120, 110, and 110b, sought after for their wonderful lenses. Sadly, though, the film they were designed to use has not been made in decades. There has been a tradition of conversion of these cameras over to pack film, but now that option, too, is very limited.
This conversion kit that I have developed allows you to convert these classics to accept
4x5 graflock
backs and accessories.
This should work with the grafmatic, Polaroid 55 type backs, and many others.
When the kit is fully installed you can use your existing viewfinder and rangefinder to focus, just like when it was new. It shares the graceful lines of the original camera.
Most importantly, this back offers full view- no cropping whatsoever!
Install of this kit is a breeze, and(for you purists and collectors) it does not require ANY damage or permanent modification to the original camera. If you decide later to undo this kit, reversal is as easy as the original install.
Simple viewfinder versions like the 110 and 95:
To install, just:
remove the two hinge pins holding the original back on.
I use a push pin
or finishing nail
and tap lightly to reveal the end of the hinge pin, then grab it with a needle nose pliars.
I
have also included a bent wire from a binder clip. This allows you to get past the viewfinder without removing it. Just use the binder clip to press the hinge pin down from the top, using a flat head screwdriver against metal (not plastic) to push it out.
L
ay the
original
back
aside or box
it
up for posterity.
S
lip a zip tie into the bigger part of the 3d printed back (in the left side slot. Thread that under the bar on the camera directly next to it(once you put it in place it should be pretty obvious the bar).
P
op
the back on starting at the right hand back side.
Set the right side hinge pin by tapping it in place until it is flush with the side- it will fit very snug.
T
ighten the zip tie.
Put two zip ties in the second 3-d part(the grip).
Put the hinge pin in place on the left side and weave the two zip ties through the new back and the hing pin.
Wiggle the second part in place. It does not require force, just patience to get it lined up and in.
Now tighten down the zip ties and cut off the excess.
The front standard is set back the appropriate
31.75
mm with an offset spacer
(lens stop)
that is put in place.
There are two to choose from. Hold the spacer over the front standard to see which one matches up. Once you have found the right one, peel the double sided tape and stick it on.
Now you are ready to use your camera!!
Just pop on and lock in your favorite
4x5 back and shoot!
C
omplex viewfinder cameras like the 110A and B can be a bit more tricky because you
might
have to remove the viewfinder to get the hinge pin out.
Try the binder clip first, but if that doesn’t work then you will have to remove the viewfinder.
There are 4 screws that hold the viewfinder on. One is in the front standard area. The second is in the back under the viewfinder glass. The third is in the flash shoe. The fourth is the trickiest. It is in the right hinge area as you face the back, and you will need a skinny
Phillips
screw driver to get to it.
Once you have removed all four screws, rock the viewfinder so it is upside down. This will keep the glass from falling out. I use this opportunity to clean the interior glass, but make sure you put all the glass back exactly where you found it.
Now you can access that second hinge pin. Follow the instructions above to complete your installation.
Note: Though this back was designed specifically for graflock style backs, you can use dds style backs with some creativity and a velcro strap. You will notice there is a pass-thru area on the top and bottom of the back (in the notch of the blades). You can just weave a velcro strap through and tighten down. You could also try some elastic method!
Once you have converted your camera, you can get creative with the build. The addition of some acrylic paint or model paint can make them look more factory original!
I do sell a graflock ground glass that I make and sell separately if you don’t have one.
About me: I am an artist, college professor, creative photographer, and maker. I sell mostly Polaroid cameras, shoot mostly analog, and love to hack things. I am and have always been a huge fan of the DIY movement. I have a blog called Lo-Fi and DIY com(lofianddiy).


